Using Parchment Paper
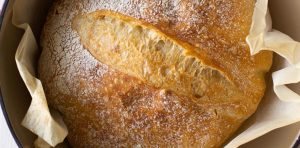
Several of our experts recommend using parchment paper when baking with cast iron. Mike Vaona, a mechanical engineer turned bread maker and small business owner, calls parchment paper your friend. Instead of proofing his dough in a proofing basket, Mike likes to proof his dough on parchment paper under a bowl. This makes it super easy to transfer the dough from the refrigerator, to the counter for scoring, and down into the hot Dutch oven for baking. He makes all of his bread in a Lodge Logic Cast Iron Dutch Oven. Mike also thinks it’s important to let nature do its thing.
“If your dough becomes too sticky, or difficult to work with, put it in a bowl, cover it, wash your hands, and take a 15-minute break,” Mike said, “Nature will do its thing and fermentation will work. Trust your instincts and don’t overthink it.”
Erin suggests turning your dough out onto parchment paper so you don’t have to score in a hot cast iron pot (plus it keeps the pot clean). She also likes to crumple up her parchment paper and run it under cool water to make the paper flexible and add a little extra steam to the oven for a crispier crust.

For bread maker, Bryan Ford, great bread marries the flavours and culture of his Honduran heritage with the basics of artisanal bread making. Brian suggests watching out for your hot cast iron when you pull it out of the oven.
“First things first,” Bryan said. “Make sure you have good, heat resistant oven mitts. The cast iron pan will be extremely hot when you have to handle it to load and score your loaf. The Combo Cooker makes scoring much easier, when compared to the Dutch oven, because it does not have much depth on the skinnier side where you load the loaf. If you are using a Dutch oven, you can flip your loaf onto a piece of parchment paper, score it, and then drop it back into the hot cast iron.”
Amy also likes to bake using the Combo Cooker but uses it differently. She suggests baking with the deeper pan as the base to make the lid easier to remove. “I recommend using the deeper pot as the base, because cast iron can be quite heavy and very hot after being in the oven,” said Amy, “This enables me to easily remove the lighter shallow lid halfway through baking.”
Heat Distribution
If you’re baking in a traditional kitchen oven, one that only has a heating element on the bottom, you may see some scorching on the bottom of your loaves. Erin solves this by tossing an empty cookie sheet onto a lower rack at the same time she puts the bread in the oven. The heat shield is a simple solution to reduce scorching.
Preheating for a Crispy Crust
For a crispy crust, preheating is key. Anna Gabur pairs her incredible artistic talent with artisanal sourdough bread making for results that are picture-perfect.
“If you prefer loaves without a dark-bottom crust, bake the bread for 20 minutes in the Dutch oven with the lid on, 10 minutes without the lid,” Anna said. “This helps the bread firm up. Then take it out of the Dutch oven to bake 10 more minutes on a baking rack. For best results, pre-heat the Dutch oven for 40 minutes at a temperature that is 50 degrees Fahrenheit higher than what the bread recipe asks for. This will compensate for the loss of heat when you take off the lid.”
Bryan also points out the importance of preheating.
“Preheat your oven with the cast iron inside so that the surface retains enough heat for your loaf to get a good oven spring. Once it’s hot enough and you’re ready to load your loaf, sprinkle cornmeal on the surface of the cast iron so that your loaf does not stick.”
He also recommends cleaning any residual oil out of your cast iron before using it to bake bread.
“If you’re like me, you use your cast iron cookware to cook just about everything,” Bryan shared, “If there is leftover oil in the cast iron, it can create lots of smoke in your oven as your bread bakes. Additionally, when you open your cast iron mid bake, oil can create a nasty steam burn!”
Get started with this recipe for sourdough bread.